Objectives
- The following tutorial will demonstrate how to use a convenient tool from Canonical called
Multipassto launch Ubuntu Linux virtual machines with ease
Prerequisites
- Linux, MacOS or Windows Operating System
- Minimum 4 GB RAM (8 GB preferred)
Introduction
Linux is an essential building block in almost all IT ecosystems powering web servers, mobile phones and IoT devices globally. In fact, container technologies such as LXD/LXC, Docker and Podman are built on top of the Linux kernel, kernel namespaces, control groups (cgroups), and processes. When you run a program such as Docker for Mac, a Linux virtual machine is launched in your Mac, and the Docker engine runs inside the Linux virtual machine. Hence, being proficient with Linux and knowing how to install and run Linux are important foundations for navigating DevOps ecosystems.
Linux comes in many flavours but there are two major Linux families that power a lot of businesses and cloud workloads:
- Fedora family of Linux distros including Fedora Linux, CentOS Linux and Red Hat Enterprise Linux
- Debian family of Linux distros including Debian Linux, Kali Linux and Ubuntu Linux
A future article will explore the Fedora family of Linux distributions while this article will focus on installing and running Ubuntu Linux virtual machines using Canonical’s Multipass tool. After learning how to install and run Ubuntu virtual machines with Multipass, you can start employing the Linux ecosystem to deploy one or dozens of web servers or set up a personal development environment with a few commands.
Install Multipass
- Go to
https://multipass.runand install Multipass for your respective operating system - Test that Multipass is installed and working by executing the following command in your terminal:
multipass version
Launch Ubuntu Virtual Machines
Launch an Ubuntu Linux virtual machine with the following command:
multipass launch --name wcd-impish impish
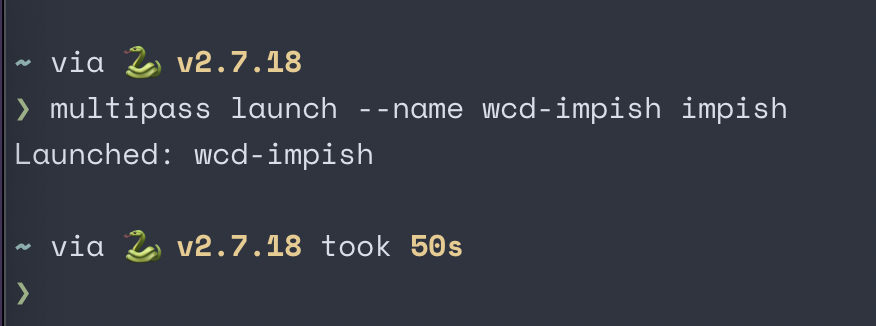
If you do not specify an image name (impish in this case) in the above command, Multipass will default to the most recent long-term stable (LTS) version of Ubuntu Linux. As of this writing, the default image used is Ubuntu 20.04 LTS. Without any other arguments, the above command also defaults to 1 CPU, 5 GB disk space and 1 GB RAM for the virtual machine. You can override these defaults like this:
multipass launch --name wcd-impish --cpus 2 --disk 8G --mem 2G impish
Configure Virtual Machine Hostnames For Convenience
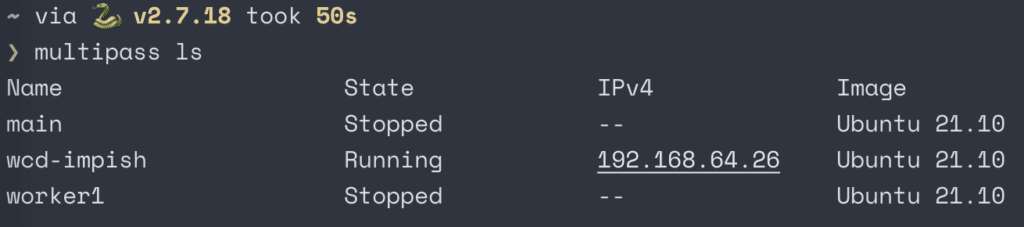
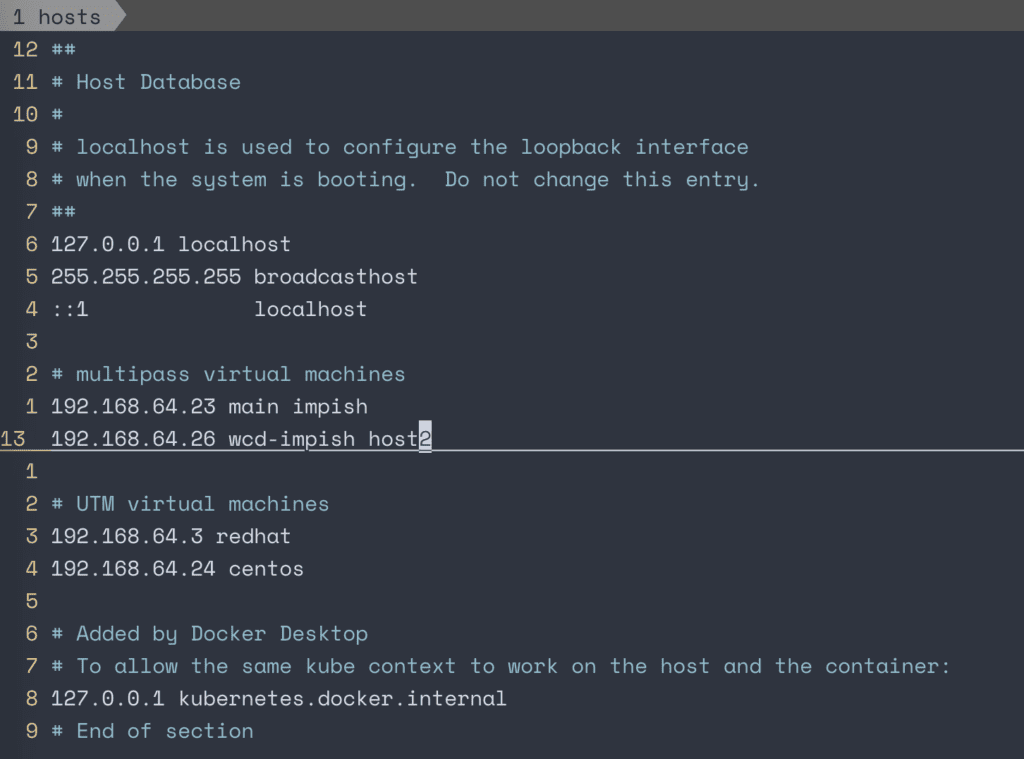
If you are on a Linux or Mac, you can also edit the /etc/hosts file and use a hostname to reference the Ubuntu virtual machine instead of having to type the IP address all the time. For example, my wcd-impish virtual machine has an IP address of 192.168.64.26
I edit my /etc/hosts file with the command sudo vi /etc/hosts and can now reference the virtual machine with aliases wcd-impish or host2:
If you tried to remotely login to your newly launched Ubuntu virtual machine with secure shell (ssh) and the default settings, you will be met with a Permission denied (publickey) message. There are three methods you can use to ssh into your Ubuntu virtual machine.
SSH into a Multipass Ubuntu Virtual Machine
Method 1 – Using Multipass Shell command
The first and easiest method is to just use Multipass’s ssh wrapper command: multipass shell
multipass shell wcd-impish
Replace wcd-impish with whatever you named your virtual machine. After executing that command you should have a remote login shell of your Ubuntu instance:
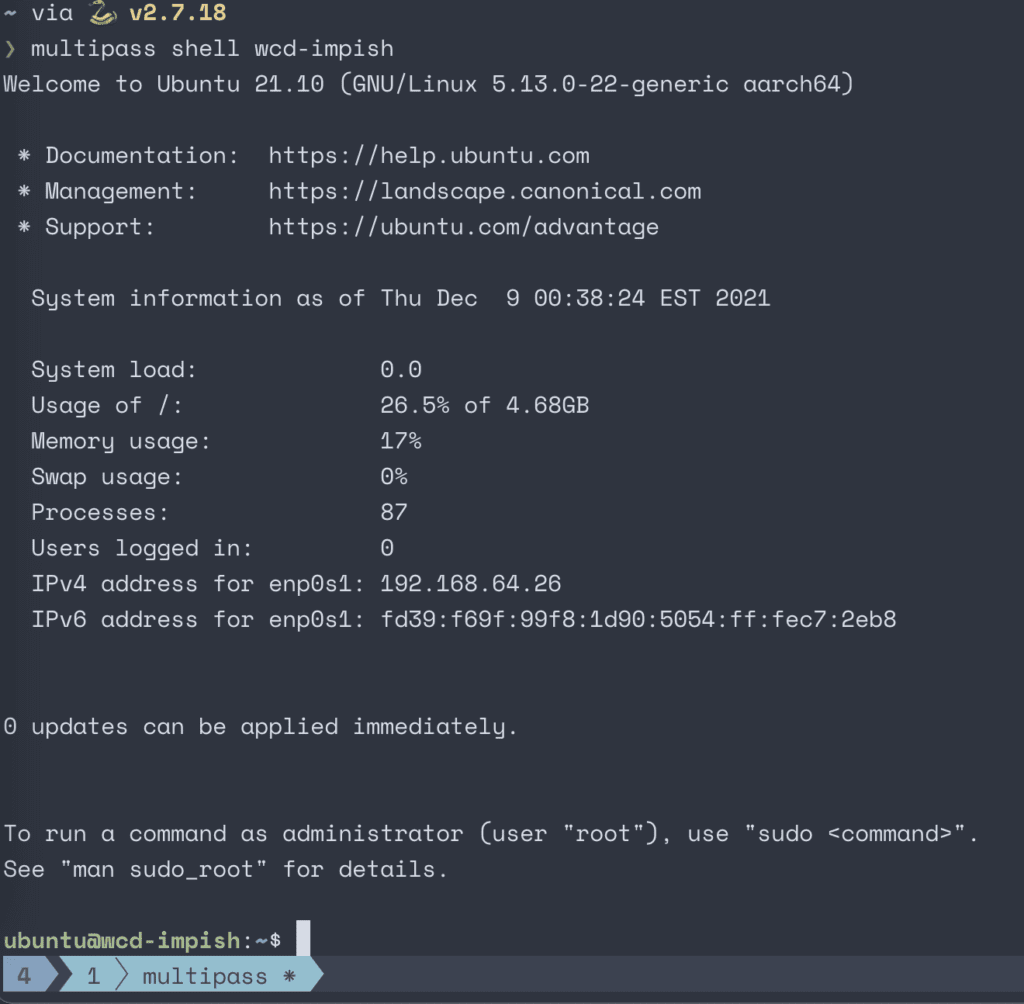
Type exit to leave the virtual machine and get back to your local shell.
Method 2 – Edit Authorized Keys File
First, generate an ssh key pair if you don’t already have one. If you are on a Linux or Mac and don’t have a private/public ssh key pair yet run the following command:
ssh-keygen -b 4096
You can choose the default answers for the questions and choose to use a password or no password for the ssh key. If you’ve successfully created an ssh key pair with defaults there should be new keys in the following folder: ~/.ssh/ . You should see two keys for example id_ed25519 and id_ed25519.pub (or id_rsa and id_rsa.pub ). The key that ends in .pub is the public key and this public key will be stored in the remote servers that you want to ssh into. The private key is the one you safeguard on the machine you will be using to ssh from.
Now that you have the ssh key pair, copy the contents of the public key and use multipass shell to login to the Ubuntu instance. After you’re in the Ubuntu instance, run the following command:
vi ~/.ssh/authorized_keys
and paste your public key on a new line. It should look something like this:

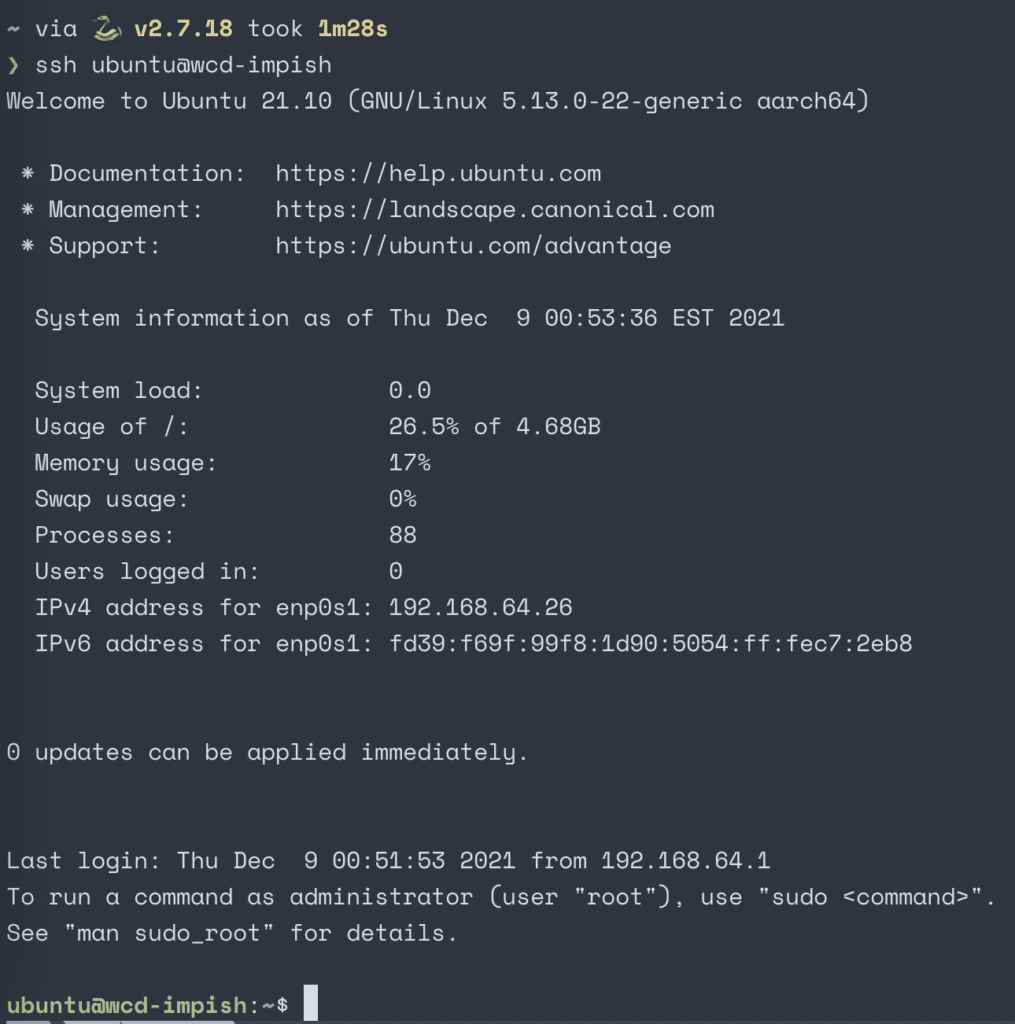
Save the file and exit the Ubuntu instance. Now when you try to ssh into the Ubuntu instance with this command:
ssh ubuntu@wcd-impish
you should have a successful remote login shell. Note: replace wcd-impish with your Ubuntu instance hostname or IP address.
Method 3 – Launch Ubuntu Virtual Machine with Cloud Init
Another way to enable ssh login right after launching a Ubuntu instance is to launch the virtual machine with cloud-init which is a tool to enable customizations on Linux virtual machines at launch. It lets you define user data to customize Linux instances at launch.
First create a cloud-init file, for example cloud-init.yaml and paste your ssh public key in the file:
ssh_authorized_keys:
  - **ssh_public_key**
Then next time when you launch a Ubuntu instance with Multipass, point it to the cloud-init.yaml file:
multipass launch --name wcd-impish --cloud-init cloud-init.yaml impish
After the Ubuntu instance is launched, you can directly ssh into the Ubuntu instance without having to manually add the ssh public key to the authorized_keys file:
ssh ubuntu@wcd-impish
Summary
In this tutorial, we learned how to:
- Use Canonical’s Multipass tool to launch Ubuntu Linux virtual machine instances
- Remotely log into the newly launched Ubuntu instances by:
- Using Multipass’s
shellssh wrapper tool - Editing the Ubuntu instance’s
authorized_keysfile - Configuring user data in a cloud-init yaml file and launching a Ubuntu instance with the cloud-init file
- Using Multipass’s
Just installing and running Linux instances is not very useful by itself. In future articles, we will see how we can start employing these Linux virtual machines to do more useful things such as host a web server, install and run containers, and monitor multiple Linux servers with a web console.
